If your driveway or front path has gone from a crisp, even colour to something that looks more like a grey-green patchwork, you are not alone. Block paving takes a real beating in the North West — the combination of persistent damp, shade from neighbouring houses and general traffic means most driveways start looking tired within a few years of being laid. The good news is that in the vast majority of cases you can restore faded block paving to something close to its original appearance without lifting a single block. What looks like permanent damage is usually surface contamination, and the right process deals with it systematically.
This guide walks through that process in the order it should actually happen — from pre-treatment right through to sealing — with honest notes on what each stage achieves, where DIY has limits, and what realistic results look like. If you want to understand what a professional job involves before deciding whether to tackle it yourself or hand it over, this is a practical starting point.
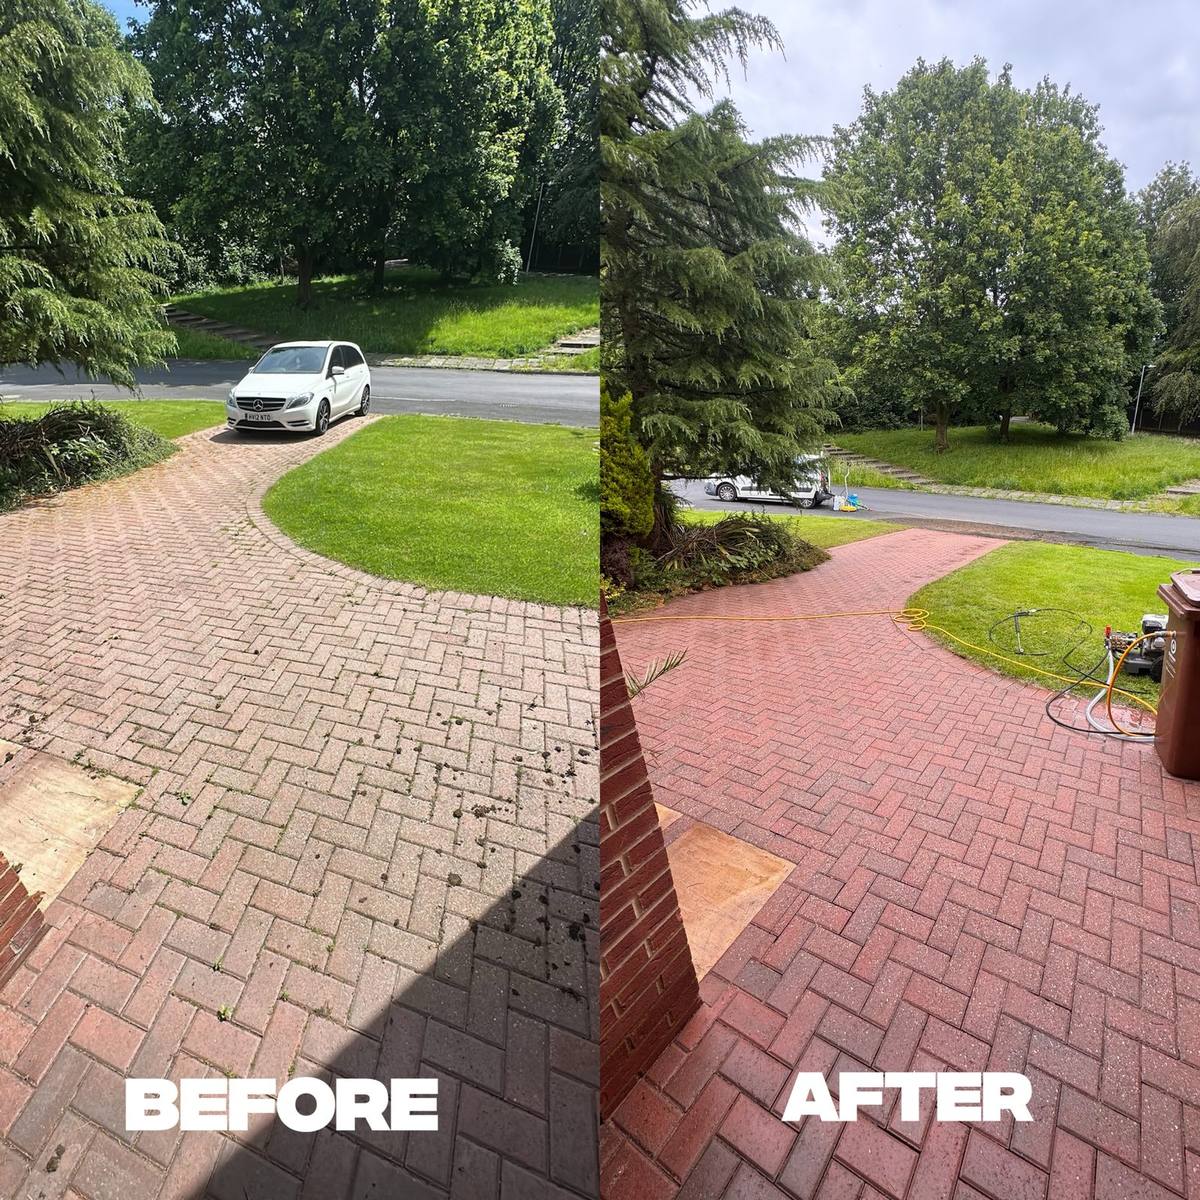
A red block paving driveway in Greater Manchester — before and after a full clean and restoration by C&C Precision.
Quick answer: To restore faded block paving, pressure wash it thoroughly to strip dirt, algae and old sand, then re-sand the joints with kiln-dried sand and apply a quality sealer. This brings back the original colour, locks in the joints and protects against future fading — results typically last 3–5 years.
Why Block Paving Fades in the First Place
Most fading comes down to a handful of causes that build on each other over time. UV exposure slowly bleaches the pigment out of concrete and clay blocks, particularly on south-facing driveways that get direct sun through the warmer months. At the same time, algae, lichen and green mould colonise the surface — especially on north-facing or shaded areas — depositing a grey-green film that makes the whole driveway look flat and neglected. Embedded dirt from tyres, leaves and general foot traffic fills the texture of the blocks and dulls the colour further.
Underneath all of that, the joint sand is usually in a poor state. Over time it washes out, gets eaten by weeds or simply compacts unevenly, leaving gaps that allow water to sit and organic growth to take hold. Any surface sealer that was applied when the paving was new has likely broken down as well, which means there is nothing left to repel staining. The result is a surface that looks far worse than it actually is. In most cases the blocks themselves are structurally sound — it is everything sitting on top of them and between them that needs addressing.
Step 1 — Clear the Surface and Kill Organic Growth
Before any water or pressure gets involved, the surface needs to be properly cleared. That means pulling out weeds by hand or with a tool rather than just cutting them off at ground level — leaving roots in place means they are back within weeks. Moss, leaf debris and any loose material should be swept or blown off so that nothing gets forced deeper into the joints once washing starts.
On paving that has gone heavily green, it is worth applying a biocide or pre-treatment solution before the pressure wash rather than relying on the wash alone to do everything. A diluted sodium hypochlorite solution is effective here — the same chemistry used in professional soft washing for rendered and stone surfaces. Applied at the right dilution and left to dwell for 20 to 30 minutes, it kills off algae and lichen at the root rather than just shifting the surface layer. This makes the pressure washing stage significantly more effective and reduces the chance of growth returning quickly.
Step 2 — Pressure Washing Block Paving Properly
This is the stage most people picture when they think about how to restore faded block paving, and it is also where most DIY attempts run into trouble. The instinct is to use a lance and work over the surface systematically, but a lance concentrates pressure into a narrow point. Used at close range, it strips joint sand out of the gaps, creates streaky lines across the block faces and can chip or pit softer concrete blocks. It also takes much longer than the right tool for the job.
A rotary surface cleaner — a flat spinning head that distributes pressure evenly across a wide disc — is what professionals use on block paving. It cleans consistently without concentrating pressure in any one spot, and it is far faster on a large area. The machine is kept moving at a steady pace so no section gets over-treated. Even with the right equipment, some staining — deep oil contamination in particular — will lighten rather than vanish completely. It is worth being realistic about that before the work starts. For a thorough overview of what the cleaning stage involves on driveways specifically, the driveway cleaning and block paving cleaning service pages cover the process in more detail.
Step 3 — Re-Sanding the Joints with Kiln-Dried Sand
A deep clean always disturbs the joint sand to some degree, even when a rotary cleaner is used carefully. This is not a problem — it is simply a step that has to follow. Skipping re-sanding after a proper pressure wash is one of the most common mistakes homeowners make, and the consequences show up quickly: weeds return faster because the open joints give seeds somewhere to germinate, and without the lateral support that packed joints provide, individual blocks can shift and become uneven over time.
Kiln-dried sand is used rather than building sand or sharp sand because it is fine enough to settle properly into narrow joints and dry enough to brush in without clumping. The surface needs to be completely dry before it goes down — which in Greater Manchester means picking the right day and sometimes waiting longer than you would like. The sand is spread across the paving, brushed diagonally into the joints, and then compacted with a plate compactor so it beds in firmly. A second application often follows to top up any gaps. For more on when and why this stage matters, the guide on top signs your paving needs resanding is worth a read, and the block paving re-sanding service page covers what the job involves in practice.
Step 4 — Sealing the Paving to Lock in the Colour
Sealing is optional but it makes a meaningful difference to how long the results of a clean and re-sand actually last. There are two main types of sealer to understand. A wet-look or enhancing sealer deepens the existing colour of the blocks, giving the paving a slightly richer, more saturated appearance — closer to how new wet concrete looks. A natural-finish sealer stabilises the colour without adding sheen, so the paving looks clean and fresh but not glossy. Which one suits depends largely on personal preference and the style of the property.
Both types work by forming a protective layer over the block face and partially into the joints, which makes the surface resistant to oil penetration, weather staining and the early stages of algae re-colonisation. Future cleaning becomes significantly easier because contamination sits on top of the sealer rather than working into the block itself. Realistically, a correctly applied sealer holds up for three to five years on a residential driveway, depending on traffic levels, whether the area sits under heavy tree cover and how much weather it takes. The guide on block paving sealing — is it worth it goes into more depth on the cost-benefit side of the decision.
When It's Worth Calling a Professional
DIY is entirely workable for small areas in reasonable condition, but there are situations where the gap between a home attempt and a professional result is wide enough to matter. Domestic pressure washers — the kind available in most DIY sheds — typically run at 100 to 130 bar. That is enough to shift surface dirt but not enough to properly clean compacted algae and deeply embedded grime from block paving. Hiring a rotary surface cleaner is possible but the machines available for domestic hire are often underpowered compared to trade equipment, and an unfamiliar machine on a large area is easy to misuse.
Sealer application is another area where getting it wrong is costly. Applied to a surface that is not fully dry, or in direct sunlight, many sealers cure with tide marks or an uneven sheen that is very difficult to reverse without stripping and starting again. Large driveways, heavily contaminated surfaces, block paving that has not been touched for five or more years, and any situation involving commercial premises are all cases where professional equipment and experience produce better results in less time. If you are in Greater Manchester and want a straightforward quote, C&C Precision Precision Pressure Washing offers fast turnaround on quotes via WhatsApp — send a couple of photos and most customers have a price back within the hour.
If your paving has not been touched for several years, do not seal over a dirty surface. Sealer locks in whatever is underneath it. A thorough clean and re-sand must come first, and the surface must be fully dry — ideally after 24 hours of dry weather — before any sealer goes down.
Practical Tips to Keep Block Paving Looking Good Longer
Restoring faded block paving is a significant job, and a bit of straightforward maintenance afterwards makes a real difference to how long the results hold. None of it is complicated.
- Sweep regularly. Leaf debris left sitting on block paving breaks down and feeds algae. A weekly sweep during autumn and a monthly one the rest of the year keeps organic material from building up.
- Deal with weeds early. A small weed pulled out before it roots properly takes seconds. Left for a season, the root system works into the joints and causes real disruption when removed.
- Avoid washing up liquid and household bleach on sealed surfaces. Both degrade sealers faster than normal weathering. If you need to clean a spot, use plain water and a stiff brush.
- Do not wait until it looks terrible. A professional clean every two to three years costs significantly less than a full restoration job on paving that has been neglected for a decade. The driveway kerb appeal upgrades guide covers how this fits into the broader picture of maintaining a property's exterior.
- Check the joints annually. If you can see gaps or the sand has clearly washed out in places, a top-up of kiln-dried sand before the weeds take hold keeps the structure sound and the surface stable.
Frequently asked questions
Can you restore block paving without sealing it afterwards?
Yes — cleaning and re-sanding alone will make a significant difference and is a perfectly valid option. Sealing just extends how long the results last and adds stain resistance. If your budget is tight, a thorough clean and fresh kiln-dried sand is still well worth doing.
How long does restored block paving stay looking good?
With sealer applied correctly, you can expect 3 to 5 years before it needs attention again, depending on traffic, tree cover and weather. Without sealer, plan to clean every 1 to 2 years to keep on top of algae and weed growth in Greater Manchester's damp climate.
Will pressure washing damage my block paving?
Not if it's done correctly. The risk with DIY is using a lance too close to the surface, which erodes joint sand and can chip softer blocks. A rotary surface cleaner at the right pressure does the job without damage — it's the tool professionals use for a reason.
How much does it cost to have block paving professionally restored in Greater Manchester?
Price depends on the size of the area, how overgrown it is, and whether you want re-sanding and sealing on top of the clean. As a general guide, block paving cleaning starts from around £3.50 per square metre, rising to £4.25 per square metre with a chemical treatment included, and £5.50 per square metre for a full restoration with re-sanding. Re-sanding only, without a clean, is typically around £2.00 per square metre. The fastest way to get an accurate figure for your specific job is to send a couple of photos over WhatsApp — most customers have a price back within the hour.
Want to know what your driveway would cost to restore?
Send a couple of photos over WhatsApp and we'll come back with a fast, honest price — no obligation.